


How to Sew Patches Onto a Leather Motorcycle Vest

Updated: 5 days ago
Disclosure: MotoGearRater and Legendary USA have the same owner. Links to legendaryusa.com in this article go to our owner’s store, and are marked as sponsored. How we make money
You sew patches onto a leather motorcycle vest by hand, with a glover's needle and heavy waxed thread, working around the perimeter of the patch about an eighth of an inch in, and the easiest vest to do it on is a plain one like the Legendary Dixon at $125. A home sewing machine will not push a standard needle through vest weight leather and a lining without skipping or jamming, and iron on adhesive does not belong anywhere near a hide. Hand stitching is slower and it is the method that lasts.
The part people get wrong is not the stitching, it is everything before it. Leather does not forgive. Every hole you make is permanent, so a pin used to hold a patch in place leaves a mark you cannot remove, and a patch positioned by eye and then stitched down crooked stays crooked forever. The vest you start with matters just as much: a clean back panel with no pockets or yoke seams is the difference between an afternoon and a fight. Get those two things right and the sewing itself is straightforward.
How These Were Judged
For this list I ranked vests purely as a canvas. That means the size and cleanliness of the back panel, how workable the material is with a hand needle, whether the front has space for small patches and pins without fighting the closure, and what it costs, since a vest you are about to put a hundred holes in should not be precious. Longevity mattered too, because a patch set outlives most vests and moving one is a miserable job.
The numbers here are editorial scores from wearing this gear and working on it, not measurements of anything. We do not run lab tests and a score says nothing about crash performance. All of the leather below is unarmored and none of it is CE rated. Prices verified August 2026.
1. Legendary Dixon Vest, The Best Canvas for the Money
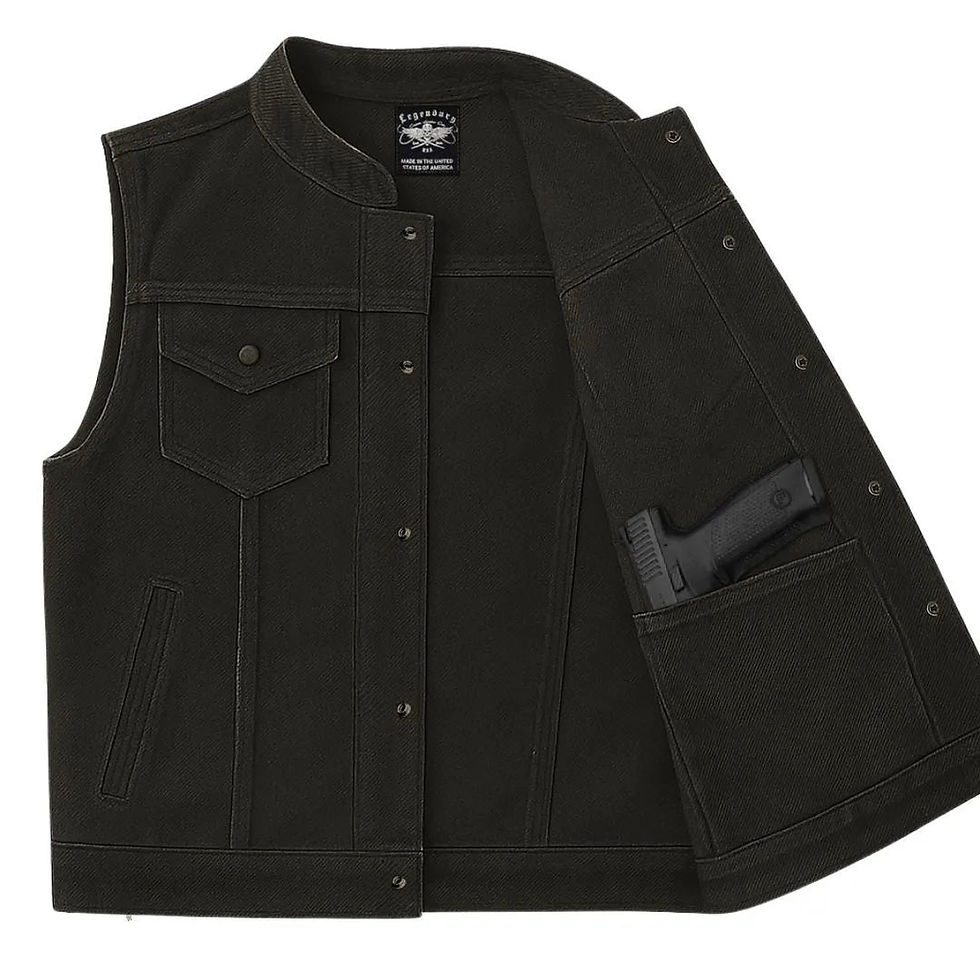
The Dixon at $125 is the plainest leather vest in the range and the cheapest, and both of those are features when you are building a patch set. Plain means an open field to lay out a design without working around hardware, and cheap means you can commit to a layout without agonising over it. The leather is workable by hand without a punch, which is not true of the heaviest vests here. If you are sewing your first patch onto leather and you want the lowest stakes way to learn, this is the vest I would put in front of you.
Price: $125
Score: 9.0 out of 10
Best for: a clean, affordable leather canvas you can learn on
2. Legendary Revolution Denim Vest, Easiest to Sew Full Stop
If the sewing itself is what worries you, start in fabric. The Revolution black denim vest at $65 can go under a normal home sewing machine with a denim needle, which turns a two hour hand stitching job into fifteen minutes. You can also pin it without leaving permanent marks, which makes layout far more forgiving. Black denim holds patch colours well and does not fade into a washed out grey the way blue does. It will not last like leather, and for a lot of riders that is fine when the vest is really a carrier for the patches.
Price: $65
Score: 8.7 out of 10
Best for: machine sewing, forgiving layout, and the lowest cost of a mistake
3. Legendary Club Vest, The Traditional Choice
The Legendary club vest with lacing at $179.99 is the shape most patch sets end up on, and side lacing is a quiet advantage for this job: a vest that adjusts still hangs correctly once a heavy back patch adds weight and stiffness to the panel. Heavier leather is more work with a hand needle and you may want a stitching awl to pilot the holes, but the result is a vest that carries a full back patch without the panel deforming around it. This is the one I would buy if the patch set is meant to be permanent.
Price: $179.99
Score: 8.8 out of 10
Best for: a permanent set on the traditional cut, back patch included
4. Legacy of Legends Cowboy Vest, Best Mixed Panel Option
The Legacy of Legends Cowboy cropped vest at $145 mixes twill with leather, and mixed material vests are more interesting to patch than people expect. Fabric panels take a needle easily so small patches and name tapes go on quickly, while the leather sections give you a surface that holds a heavier badge without sagging. The cropped cut means less back real estate than a full vest, so plan a smaller layout rather than trying to force a large back patch onto a panel that cannot hold it. Measure the panel before you order the patch, not after.
Price: $145
Score: 8.3 out of 10
Best for: smaller layouts across mixed fabric and leather panels
5. Fox Creek Leather, The Heavy One We Do Not Sell
Fox Creek is an American maker we do not carry and are not linking, and they are worth naming here for a reason that cuts both ways. Their vests use noticeably heavy hide, which is excellent for a vest that will carry a big back patch for twenty years and genuinely difficult to hand sew without an awl and a fair amount of patience. If you are paying a leather shop to do the work anyway, that weight is an advantage and you should look at them. If you plan to sew it yourself on the kitchen table, start somewhere lighter and work up to it.
Price: not sold by us, buy direct from the maker
Score: 8.4 out of 10
Best for: heavy hide under a big patch, if someone else is doing the stitching
The Method, Step by Step
This is the sequence I use, and the order matters more than the speed.
Lay the vest flat and position the patch with the vest closed. Step back and look at it from six feet before you commit, because a patch that looks centred up close often is not.
Hold it with double sided basting tape or binder clips at the edges. Never use pins on leather. Every pinhole is permanent.
Use a glover's needle, which has a triangular point that cuts through hide instead of pushing at it. A regular needle will bend or leave a ragged hole.
Thread it with bonded nylon or heavy waxed polyester. Cotton thread rots from sweat and sun in a couple of seasons and takes your patch with it.
Stitch around the perimeter roughly an eighth of an inch inside the patch edge, in a backstitch or a saddle stitch, keeping the stitch length even. Even beats small.
Pilot the holes with a stitching awl first if the leather is heavy. It is slower for the first ten holes and much faster for the next two hundred.
Never iron a patch onto leather. Heat glazes and shrinks the surface, the adhesive fails anyway, and the damage does not come out.
Take large back patches to a shoe repair shop or a leather worker with a walking foot machine. It costs less than you think and the result is straighter than hand work.
Condition the panel afterwards if you have worked it hard. Products on the leather care page will do it, and availability moves so check stock.
Common Questions
How do I sew patches onto a leather motorcycle vest? Hand stitch them with a glover's needle and bonded nylon or waxed thread, running a backstitch about an eighth of an inch inside the patch edge. Hold the patch with double sided basting tape or clips rather than pins, since pinholes in leather are permanent. For a large back patch, a shoe repair shop with a walking foot machine will do a straighter job than most of us can by hand and will not charge much for it.
Can I use iron on patches on leather? No. Heat damages the surface of a hide, the adhesive does not bond reliably to finished leather, and the patch peels at the corners within a season anyway. If a patch arrives with adhesive backing, sew through it and treat the glue as nothing more than a way to hold position while you work.
Where should patches go on a vest? The back panel is for the big piece, and the front is for small patches, name tapes and pins. If you are riding with a club, the placement rules are theirs and not mine, and the real ones will tell you exactly where their patches go and who is allowed to wear them. For everyone else, keep it symmetrical and leave the pockets clear so you can still use them.
What I Would Buy
For a patch project the Dixon at $125 is the pick, because a plain affordable leather vest is the right canvas and a low stakes place to learn hand stitching. The runner up is the Revolution denim vest at $65 if you want to sew it on a machine, and the club vest at $179.99 if the set is permanent and includes a full back patch.
Take your time with layout and buy good thread. The vest is unarmored leather with no CE rating, so it is a garment and a canvas rather than protective gear, and the patches are the part you will still care about in ten years. If none of these is your shape, the rest of the men's USA made vests are worth a look before you start cutting thread.


